Port locker tie-down Total Page Hits: 1345
Post Type: Technical/Project
Boat Part: Cockpit
Date Modified: 02/11/2018 2:36 PM
Shared August 28, 2009 by Howard Audsley.
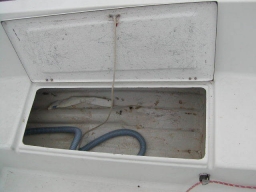
One of the concerns some have about the M17 is the port side cockpit locker didn’t come with a locking mechanism. If something really bad happened and the cockpit filled with water and the locker were to open, it could flood and sink your boat. At the same time, not being able to lock it down also invites thieves to rummage around to see what they can find when you are not around.
You could put a hasp and padlock on it, but a simpler method has been devised, using a couple dead eye straps, a jamb cleat and a piece of 1/4″ or 5/16″ line.
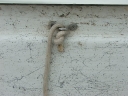
The position of the line is such that with the locker closed, it’s held over a fore and aft plywood divider on the inboard side of the cockpit locker. The upper terminal dead eye looks like this, and is held on with pop rivets….line has a figure 8 stopper knot:
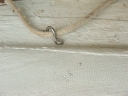
Below that is another dead eye, set at a 45 degree angle, which acts as a “turning block for the line, which then runs forward along the inside wall of the cockpit floor. Viewed from above, it is mounted on the inboard plywood divider that makes up the inboard cockpit locker wall:
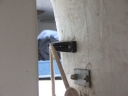
This ends at a jamb cleat just inside the companionway. This one doesn’t have an fairlead eye on it, but would be improved if it did. Again, held by pop rivets:
So the process to lock the lid down is when the lid is closed, simply pull the line tight from within the cabin and cleat it. It has enough holding power to prevent the lid from raising under all but extreme conditions. It would not stop a real thief, but would keep curious explorers out of your lockers and honest men honest. It’s inside the cabin, so when the hatch is locked, it can be too.
No real downside other than having the line in the way in your locker, but in practice, I don’t even notice it.